Style Options
ADD NECKLINE STYLES
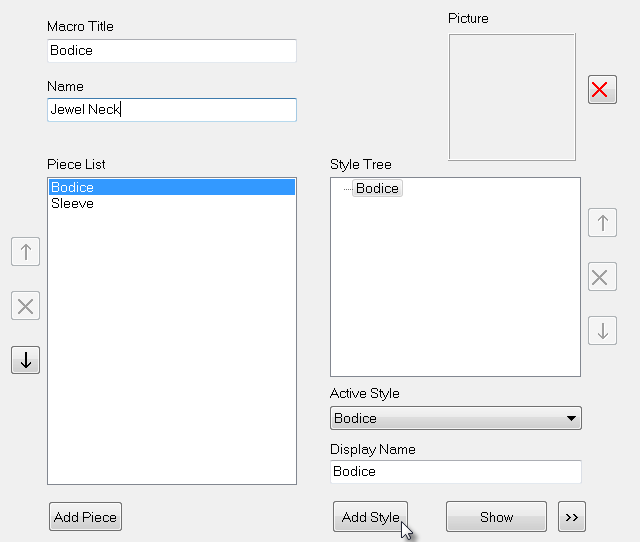
Make sure that “Bodice” is selected in the Piece List, then click “Bodice” in the Style Tree.
Type “Jewel Neck” in the Name field.
Click the “Add Style” button under the Style Tree window.
The new style “Jewel Neck” appears indented under “Bodice” in the Style Tree. This indicates that the Jewel Neck is a “variation” or an “option” of the basic bodice.
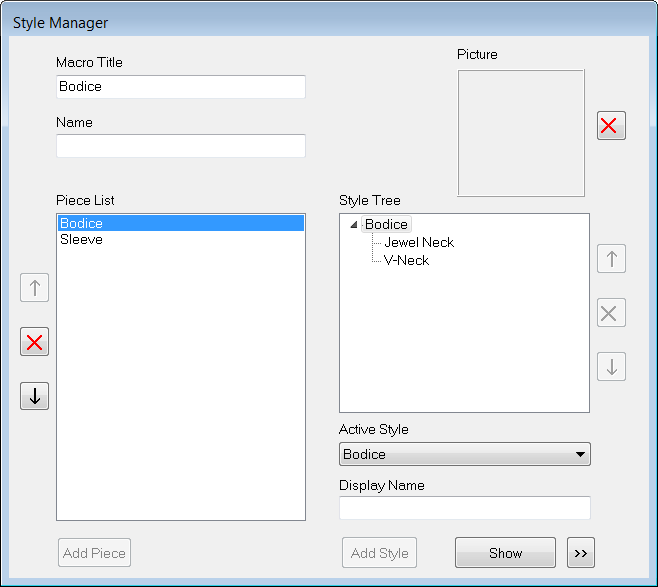
Highlight “Bodice” again on the Style Tree and then type “V-Neck” in Name field.
Click the “Add Style” button.
Now there are two “variations” for the bodice: Jewel Neck and V-Neck. These are the options that will appear in a dialog box when the macro is run.
Save the macro as BodiceWithSleeve_1.mg4
MODIFY NECKLINE STYLES
Since the original basic bodice already had a jewel neck, the Jewel Neck variation doesn’t need to be changed. We do need to modify the V-Neck, however. We will do this by editing some existing points and adding some new ones in the V-Neck Piece window.
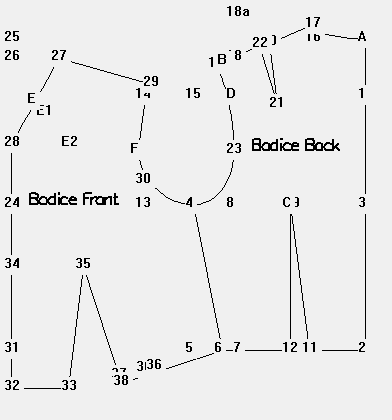
Click “V-Neck” in the Style Tree and "Show" to open the Piece window. Notice how the variation automatically inherits all the points contained in the “parent” piece (in this case, the Bodice). In this piece the points of the sleeve are not visible because they are created in a later piece.
We can change the neck line into a V-neck line by moving point 28 a couple of cm down and then by changing point E to be the center of points 27 and 28. If these three points are all in a line, the curve will become a line. We could also modify the object itself to get the same result (changing the object by deleting point E from the object, then we have a straight line between 28 and 27), but we will save that method for later, when we create some sleeve styles.
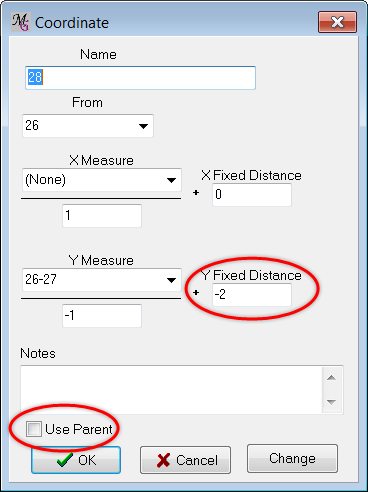
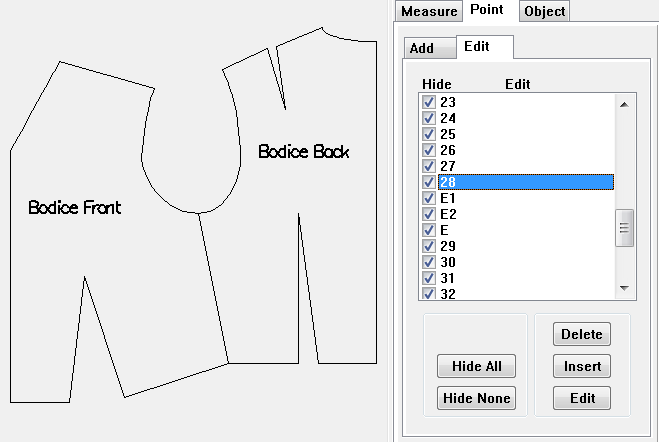
From the panel, select Point and Edit, highlight point 28 and click the "Edit" button or double click at point 28.
Since you are modifying ONLY for the V-Neck style, uncheck the "Use Parent" box.
Now you can edit the values of point 28. For the V Neck we lower the neckline 2", otherwise it will be too tight . This means that the Y Fixed distance is set to -2 (minus is down).
Then we edit point E, highlight point E and click the "Edit" button or double click at point E.
Since you are modifying ONLY for the V-Neck style, uncheck the "Use Parent" box.
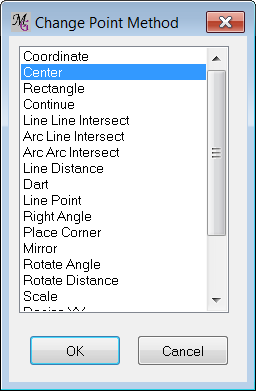
Click the "Change" button.
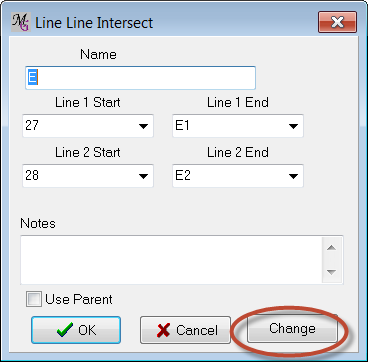
Select Center from the Change Point Method form.
The Center form opens.
Make sure "Use Parent" is unchecked (This is important, otherwise you can not change the values!).
MacroGen has filled in already some points that were used in the former point E . Check if these points are right
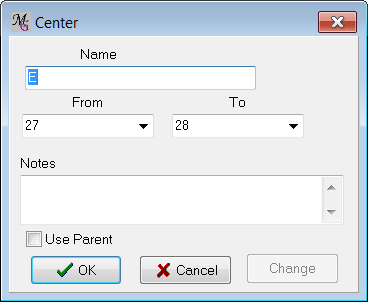
Click OK
Now Point 28 is lowered and point E is in the middle of Point 27 and Point 28.
We can get a better view of the object by turning off the points (or, more accurately, the number label at each point).
Using the panel, select the Point and Edit tabs. A check mark in the box next to a point will hide that point, and an unchecked box leaves the point visible. You can also "Hide All" or "Hide None".
We want to turn all the points off to get a good look at our drawing, so click "Hide All".
With the point labels out of the way, it is clear we have a V-Neck. Neat, isn’t it?

Now save your work again by clicking the Save icon from the File Toolbar or use the Save as command in the file menu and give it a different name (e.g. BodiceWithSleeve2.mg4).

Then select the “Create Macro” icon from the File Toolbar. Nothing will appear to happen, but the macro has been created! Remember, MacroGen automatically gives the macro the same name as your MG4 file that you just saved and saves it in the same folder.
Now let’s try running the macro and see what happens.

Select "the “Test Macro" icon from the File Toolbar or select the “Test Macro” from the File menu.
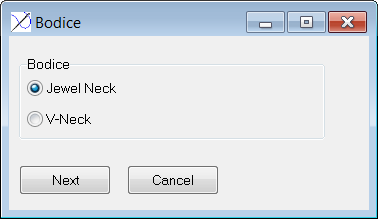
PatternMaker opens and we see the first Style option form.
The title of this dialog box (Bodice) comes from the piece name, and the listed options are the variation names (Jewel Neck, V-Neck). If we want to change the appearance of this dialog box, we change the corresponding options in MacroGen. (See the Help file under “Macro dialog box captions” for a detailed diagram.)
A couple of issues come up and are worth mentioning at this point. First of all, we can never select the Bodice style (in this particular file) in PatternMaker, only Jewel Neck and V-Neck. The following rule applies: if you descend (create from your master pattern) a “child” style, you lose that original style option in the PatternMaker dialog box. This isn’t a problem because the child is always a duplicate of its parent (at least until you change it).
In the case of the Bodice macro, the Jewel Neck style (child) is identical to the parent, since you have changed nothing.
If you use PatternMaker to modify an object (Edit Macro), it keeps track of which piece style you’re modifying and applies the changes to that style only. For example, if we had run PatternMaker, selected Jewel Neck and changed it, those changes would show up in the Jewel Neck style in MacroGen, but not in the Bodice style or the V neck style. Once a “style variation” is added (i.e. the Jewel Neck version), the “parent style” (the Bodice) can no longer be modified in PatternMaker.
Cancel the macro and close PatternMaker without saving.
ADD & MODIFY SLEEVE STYLES
Now we are going to add the short sleeve option to the sleeve.
First save the macro as BodiceWithSleeve3.mg4.
-
Go to the Style Manager.
-
Under Piece List highlight “Sleeve.”
-
Under Style Tree select “Sleeve.”
-
In the Name field type “Long Sleeve” and click “Add Style.”
-
Under Style Tree select “Sleeve.”
-
In the Name field type “Short Sleeve” and click “Add Style.”
You’ve now added two variations to the Sleeve. You should see the following:
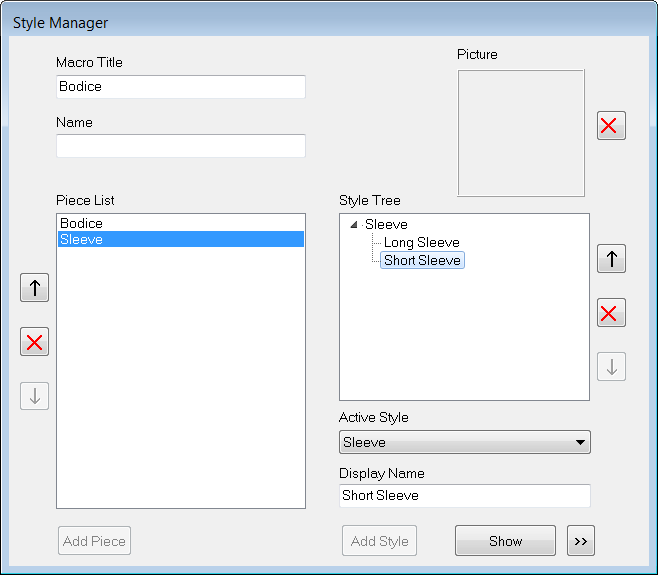
Double click on “Short Sleeve” under the Style Tree (or highlight “Short Sleeve” and click the “Show/Hide” button) to display the Short Sleeve editing window.
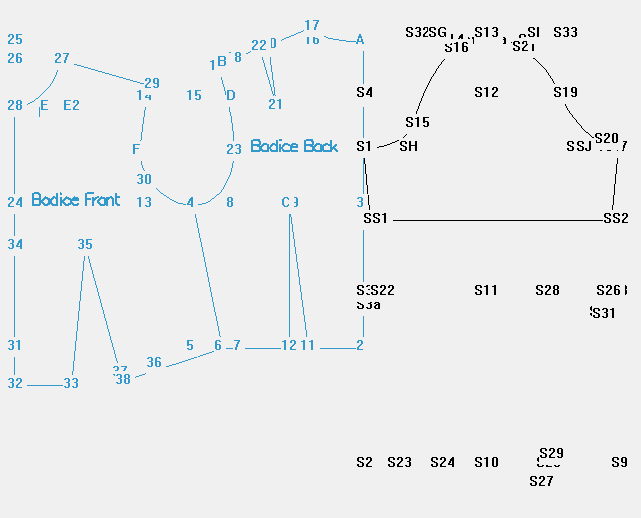
To create a short sleeve we need to add a few new points. Let’s prefix them with SS for Short Sleeve. Select the Point tab in the panel and add the following points:
Pt. Name |
From |
To |
SS1 |
S1 |
S22 |
Note: You can select the points by scrolling the arrow cursor. It is faster by typing th name of the point in the name field. *
Pt. Name |
From |
To |
SS2 |
S7 |
S26 |
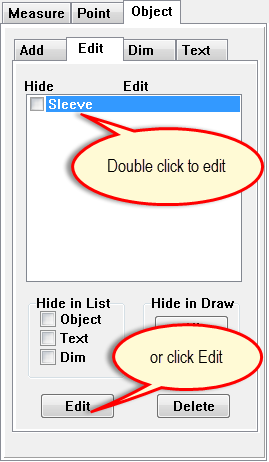
From the panel, select Object and Edit. The Sleeve object is highlighted (it is the only object in the list). Double click the Sleeve object in the list to open it for editing or click the "Edit" button at the bottom.
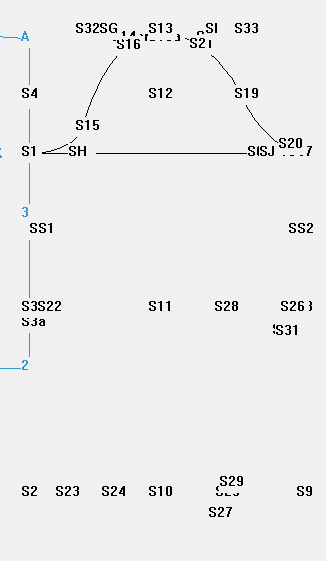
In the list after point S7 one by one double click all points (opens the Connection box of the point) and delete them (S26, S28, S31, S27, S10, S24, S23 and S22). (It looks a bit strange as the points disappear.) Click OK.
Note: You can also click left on a point on the screen to open the connection box.
Now, we need to add the short sleeve points to the object.
Open the Sleeve object again to edit it. (Double click the Sleeve object in the list or click the "Edit" button).
We need to add the points SS1 and SS2 after point 7, which is the last in the list. This means we do not need to insert a point, but can easily add it. When we click at point SS2 on the screen it will be be added automatically to the list after the last point 7.
Then click at point SS1 on the screen and it will be added to the sleeve after SS2.
The short sleeve is finished.
Note: When you added by accident first point SS1, it was necessary to insert point SS2 after point S7. Click on point S7 and right-click to open the Connection box. Then select Insert. Click at SS2 on the screen.
Always click OK after finishing an object

We have finished editing the Short Sleeve.
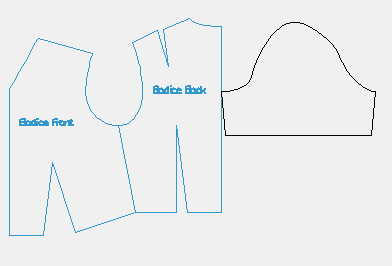
Notice the picture has the new short sleeve, and the jewel neck with it.
Save the project as BodiceWithSleeve3.mg4
We’ll view the pattern with the V-neck variation.
SELECTING THE “ACTIVE STYLE”
Close the Short Sleeve window. Go to the Style Manager.
Under Piece List select “Bodice.”
From the “Active Style” drop-down list, select “V Neck.”
Under Piece List select “Sleeve.”
Select “Short Sleeve” under the Style Tree.
Click the Show button
(we have hidden all points in this picture.)
This is important if you had a previous style that changed the location of points (like centering point E with the V-neck) and the current style uses that previous point.
You can view various combinations of options by selecting the variation you want in the Active Style drop-down list for each piece. By default MacroGen will always select the parent style as "active style".
With the principles covered in the first four tutorials, together with the Help file, you’ll be able to go a long way toward creating your very own macros that will work with PatternMaker.
In Tutorial 6, we will briefly cover some pattern marking features on the Connect Points form that you may have noticed earlier.