Add Picture
Adding pictures to each style option is a great aid to your user. Pictures show exactly what you mean for each option description, and help clear up any confusion.
Load in the Sleeve project we’ve been working on (BodiceWithSleeve4.mg4).
Under the Style Tree, from the Piece Sleeve, select "Long Sleeve".
Then click on the "Picture field".
An “Open File” dialog box opens the folder Designers (My documents/PatternMaker/Personal Files/Designers).
In the folder Tutorials you will find the file called slv_pullover_long.jpg, select it and click the “Open” button.


Note: The added picture should be a.jpg format and the maximum size is 400x400 pixels.
The selected picture of the long sleeve appears on the Picture field.
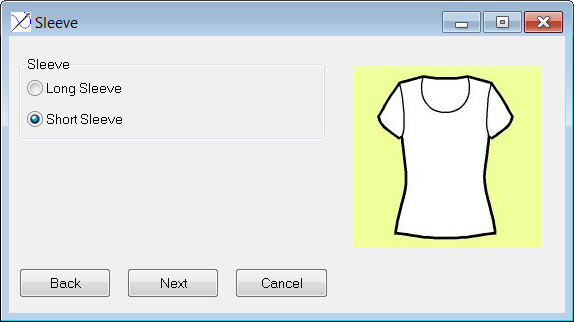
Select the "Short Sleeve" style option from the Piece Sleeve.
Click on the "Picture field" and select in the folder Tutorials the file called slv_pullover_short.jpg .
Click the “Open” button
The new picture is showing for this style.

Remember: Any time you select an style option , the selected style picture for this style is showing in the picture field. It is not necessary to add a picture here to the parent style Sleeve because when a style has children the parent style is not showed while running the macro.
Now save your macro as BodiceWithSleeve5.mg4 and test it in PatternMaker.
In the “Sleeve” dialog box, click on each option and notice how the pictures change.
Note: For being able to test the macro and see all the pictures that are added to the macro MacroGen copies and saves the pictures in the Designers test surrounding. *