Notch
Now that we have created a pattern with two styles we want to add some detailing. First we will add a notch to the sleeve.
-
Open the file we created in the last lesson (BodiceWithSleeve3.mg4), and make sure you have "Inches" selected from the Settings menu.
-
In the Style Manager select “Sleeve” from the Piece list and double-click on “Long Sleeve” under the Style Tree to display the Long Sleeve pattern window (or select Long Sleeve and click the Show button).
-
Select the Object Tab and the Sub Tab Edit. Double click the Sleeve object in the list to open it or select the Sleeve and click the Edit button. The list of points of the Sleeve object appears.
-
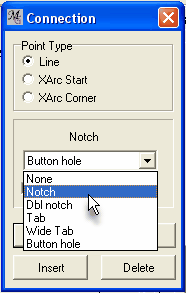
From the list, double-click "S22(Line)". The Connection box opens. Under Notch from the drop-down list select "Notch".
-
Click OK
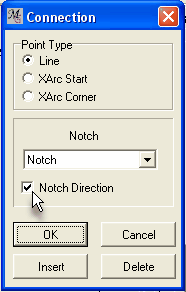
When “Notch” is selected, the point that was selected in the Points list – “S22[Line]” – changes to “S22[Line]Notch.” This indicates that we have created a notch point where point S22 is. This corresponds to the level of the elbow dart. We can’t see the notch when the sleeve is drawn in MacroGen. The only place the notch is indicated is in the Points list of the object. If we launch PatternMaker we will see that the notch points inward. The only way to check the notch direction is by running PatternMaker
To reverse the notch, put a check in the “Notch Direction” check box. When this box is checked, S22(L)Notch changes to S22[Line]Notch*.
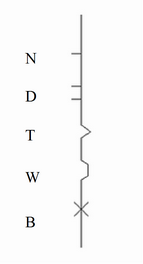
The letter inside the [ ] indicates what type of notch we have:
-
N=normal
-
D=double
-
T=tab
-
W=wide tab
-
B=button hole.
An asterisk (*) indicates the direction of the notch is reversed.
Save the project as BodiceWithSleeve4.