Measurement Table
|
Note
|
We’ll be returning to the hood we created in Tutorial 1, so the first thing we need to do is change back to metric units. (Don’t open the hood project just yet.) Select “Metric” from the Settings menu. |
There are two types of measurement tables used in PatternMaker:
-
.MMT (master measurement table)
-
.MTB (personal measurement table
The .MMT file is the “template” that you distribute with the macro. It lists all the measurements that are required for your design(s). A user will open this .MMT file, replace the default numbers with her own, and then save the list. When the list is saved, it automatically becomes an .MTB file. The user cannot accidentally erase the original .MMT file.
The personal measurement tables (.MTB) are created through PatternMaker. We’ll see how in a minute. But in order for a user to create an .MTB file, you must supply an .MMT file. MacroGen helps you create this file.
Create and save a measurement table
At first in an empty project we make a simple measurement table and afterwards we are going to import it into our Hood project. Creating the first table could also be done when you are making a macro.
-
Open MacroGen and begin a new project.
-
In the Style Manager, type “Test MeasTable” for the Macro Title.
-
Type “Piece 1” for the first Piece Name, and click the “Add Piece” button.
-
Open the editing window for the piece called "Piece 1” with the Show button.
-
Click the tab Measure from the panel. Then click the sub tab Add. Select "Prompted Measure”.
-
Add the Following Measurements:
-
Click the New button at the left bottom before every new measurement you want to add.
-
Click the Save button to save your input after every added measure.
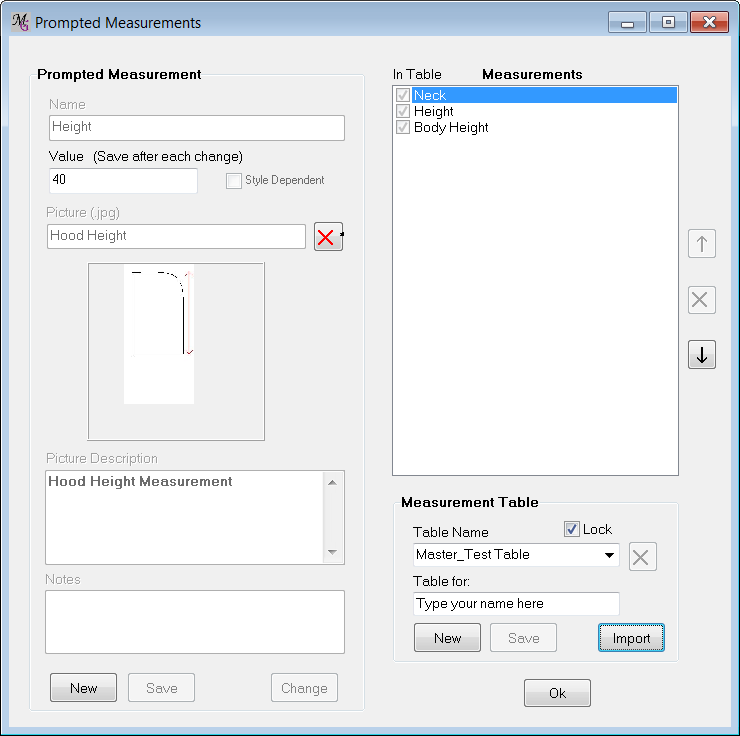
Neck |
33.5 |
(remember, we’re working in centimeters) |
Height |
40 |
Body Height:168 (can be anything) |
Bust Circ. |
96 |
(can be anything) |
Notice when you click New, a measure "New" is added to the list at the right. After clicking "Save" the name is overwritten with the typed name.
You can always open this Prompted measurements form by clicking the button "Table" in the Measure panel

When all your prompted measurements have been added, the measurement table can be made.
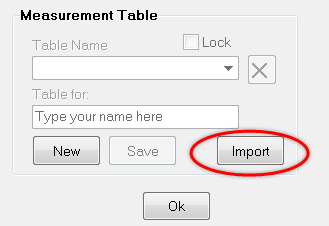
-
Click first the New button at the right bottom of the form. You can create a new measurement table.
-
Fill in the name of the table in the table name field. Make sure to make your Table name unique and clear for which macro’s it can be used (for instance Leena_women or Leena_men says it is from the designer Leena and for whom, women or men, it is used). In this case enter “Master_Test Table” as your Table name.
-
Check the measurements Neck, Height and Body Height in the list. The Bust circ. we do not want right now in this Master Measurement Table.
-
Click “Save” to save this table. It is now saved in the folder Personal Files/MeasureTables with the name Master_Test Table.mmt to be able to test the table.
When you save a table MacroGen will show a message to let you know that your table is locked to prevent from accidentally changing it. When you want to change the table after having saved it, you have to uncheck the Lock box .


Add picture and description
The names of the measures and the default values are saved to the table.
We also want to save a picture and a measure description to the measures which will be showing in PatternMaker.
-
Uncheck first the Lock box in the Measurement table field. A warning message will appear that changing the measure table could cause problems with already made macro’s (for instance when you change the name of a measurement).
-
Then select the measure "Neck" in the measurements list, click on the rectangle under the Picture Field at the left and scroll for "Hood Width.jpg". The pictures for these measures can be found in the Tutorials folder: My Documents/PatternMaker/Personal Files/Designer/Tutorials. Select the right picture and click the "Open" button. The picture will appear in the picture field.
-
In the Picture Description field, enter the description "Hood Width Measurement".
-
Click the button "Save" at the left to save your changes to the measurement.

-
Next, highlight "Height" and click on the Picture Field to scroll and select "Hood Height.jpg."
-
Type "Hood Height Measurement" in the Picture Description box.
-
Save the measurement at the left.
-
Then save the measurement table with all the changes with the "Save" button at the right bottom. The measurement table Master_Test Table is saved in the folder MeasureTables. The picture and description files (.jpg and .txt) are saved in the MeasurePictures folder (the .jpg picture is copied to it).
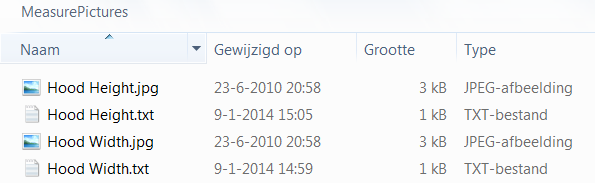
Notice: to the Body Height measure we did not add a picture or text description. These files are therefore not made in the MeasurePictures folder.
-
Click OK to exit the Measurement Table form. Then save your project file.
Modify the Hood Macro
We are going to import the Master_Test Table.mmt into the Hood macro we made in Tutorial 1.
-
Open the project file from Tutorial 1, the Hood.
-
Open the style Hood with the "Show" button to go to the pattern area.
-
Select the Tab Measure and click the Table button at the bottom. The Prompted Measurements form opens
Notice in the Measurements List the two default measurements we created, “Neck” and “Height.”
-
Click the “Import" button.
-
The folder MeasureTables opens. Select the .mmt file called “Master_Test Table” and click the “Open” button.
-
The table is imported in the Hood macro. The Neck and Height measurements that we put in our .MMT template file are checked, also the Body Height measure is showing in the list and the imported Master_Test Table .mmt is showing at the right bottom in the Measurement Table field of the form.
If you run PatternMaker you’ll notice that the hood doesn’t ask for Body Height. This is because this measure is not used in this macro. You can leave prompted measurements in the macro even if they aren’t used. This is helpful because in the future you may alter this macro so that it does need one of those body measurements.
Note:
When designing a macro, you also have the option of importing your master measurement table BEFORE you begin adding measurements or points. Then you are sure to have all the right measure names. *
Let’s look at how measurement tables are used in PatternMaker when a macro is run:
After a macro finishes displaying all the style dialog boxes, it will show an “Open File” dialog box. This is where the user can select a personal measurement table (.MTB) if she has created one. If no measurement file is selected (if the “Skip” button is clicked) the macro will display another dialog box which asks for the measurements.
If a measurement table is selected, the macro will extract the necessary measurements from the table. If conditional measurements are used in the macro, or if additional measurements are used by the macro which are not in the table, the user will be prompted for those separately.
Creating an .MTB file in PatternMaker
In case you’re not familiar with creating personal measurement tables in PatternMaker, here’s how it works:
-
Open PatternMaker. Select “Create Measurements” from the Settings menu. An “Open File” dialog box opens.
-
Select the .MMT file you want to use and click the “Open” button.
-
A form opens with two columns: a measurement name, and a default value. For each measurement, replace the default number with your own.
-
Enter your name or some other descriptive information in the field labeled “Measurement Table For:”
-
Click the “Save” button. Give the file a name and save it.
Note that since an .MTB file is created from a specific .MMT file, any particular .MTB file can only be used in macros which are based on the same MMT file. The macro contains information about which .MMT file is expected. If the information in the user’s measurement table does not match the information in the macro, the .MTB file will not be displayed. This is a safeguard to prevent a user from running your macro with, for example, measurements from Donna Designer’s Measurement System.